Activating or editing commercial leases can be a complicated task, use REstack's real estate expertise to help you
Lease:
A lease record contains all the details of a lease: information about the tenant, the space rented, the charge schedules, options, clauses, and so on.
Lease records have the following structure:

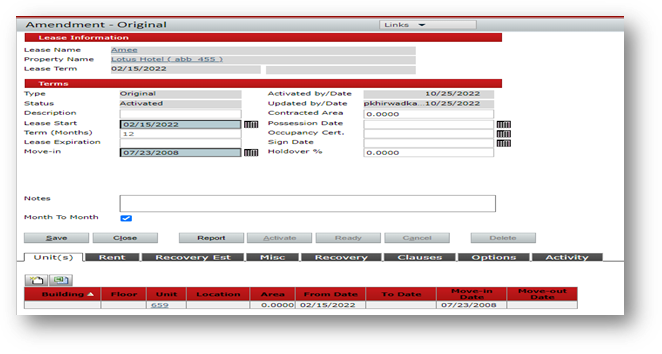
The Lease screen is the central lease record, with a series of amendments attached to it. Lease details are stored at the Amendment level. The starting terms of the lease are stored in the “original amendment” record; changes are stored in additional amendment records. The Lease Information screen contains general information about the lease.
The Amendment screen has a set of tabs for lease details: units, rent charges, recovery setup, and so on.
How to add Lease:
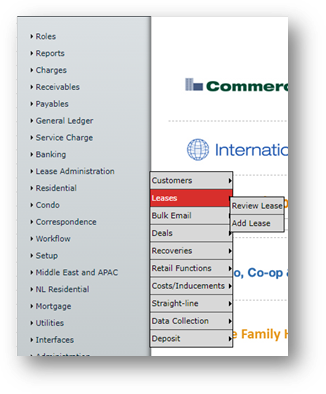
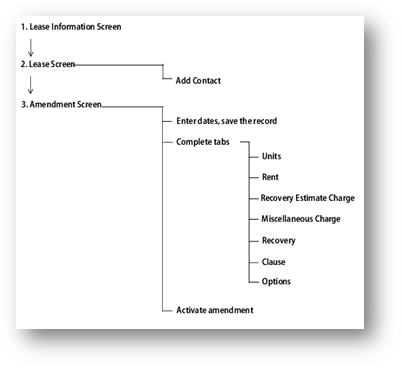
To add a lease record, you complete multiple screens and tabs in Voyager, as shown in the following diagram:
Lease Information Screen:
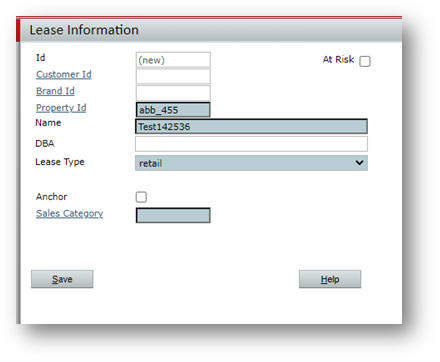
Fields:
Id: The lease code.
At Risk: Designates an “at risk” tenant, for example, a tenant who might terminate the lease early. You can use the “at risk” designation in reporting.
Customer Id: Link the lease to a customer record, if applicable. For more information, see Customers.
Brand Id: Link the lease to a brand record, if applicable. For more information, see Reporting by Brand.
Name: Enter the name of the business.
DBA: Enter a “doing business as” name, if applicable.
Lease Type: The lease type determines the type of recovery you can use with the lease. It also determines whether you can add retail setup to the lease.
Anchor: Designates an anchor tenant. Used by retail leases.
Sales Category: Used for reporting, on retail leases.
Note: Anchor and Sales Category fields will only appear if you select retail lease type.
When you click Save, tabs and fields appear at the bottom of the screen: Payment Terms, and General Info.
The Payment Terms tab varies according to the Region setting in the Country Information screen.
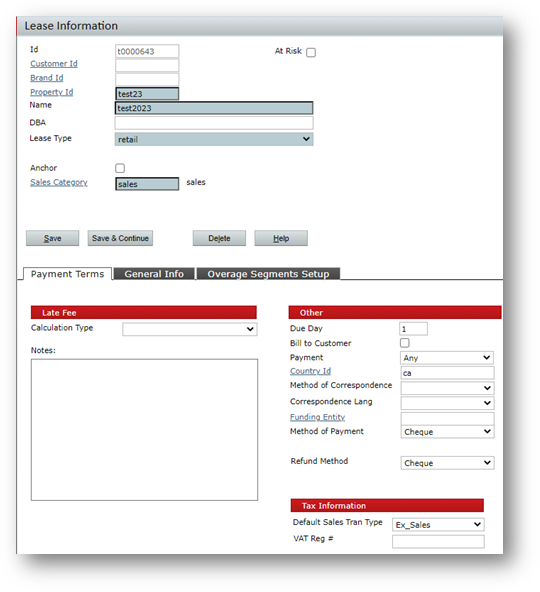
Due Day - The day of the month that will be considered the due day (used to calculate late fees). Any charge created after the due day will be due on the next month’s due day.
Bill to Customer - Select this check box if you want Voyager to bill the customer associated with the lease.
Payment - Select one of the following: Any, Do not accept, Cash Only, or On Hold.
Guarantee Required - Used with the Bank Guarantee feature.
If selected, the Lease screen will include a link to the Bank Guarantee Summary screen, where you can track bank guarantees.
Country ID - Used with the Correspondence feature. The country choice designates the language used in correspondence to this tenant.
Company - Used in corporate tenancy. The Company designates the payee.
Method of Correspondence - Used with the Correspondence feature.
Post Voyager will print correspondence. Email Voyager will email correspondence.
None Voyager generates correspondence for the tenant, but does not print it or email it.
Correspondence Lang - NOTE This field appears if the region setting is Canada.
Select the language to be used in correspondence with the tenant.
Method of Payment - This field sets a method-of-payment default for ad hoc charges and for charge schedules attached to the lease. The setting is passed on to charges and then becomes a default for receipts. Options are Cheque, Cash, EFT, Direct Debit, Draft, Cheque soc gen.
EFT - Tenant initiates payment via EFT. Bank Book uses this information to match payments to charges.
Direct Debit - System creates an electronic file that initiates a direct debit from the tenant’s bank account.
Default Sales Tran Type - The Default Tran Type value defaults from the setting in the Property screen; change it if needed. The setting in this screen then becomes a default for the transaction type field at the charge level.
Default Purchase Tran Type - For most tenants, it is a sales transaction type. For corporate tenants and head leases, it is a purchase transaction type.
Vat Reg # - Enter the tenant’s tax registration number.
Lease Screen:
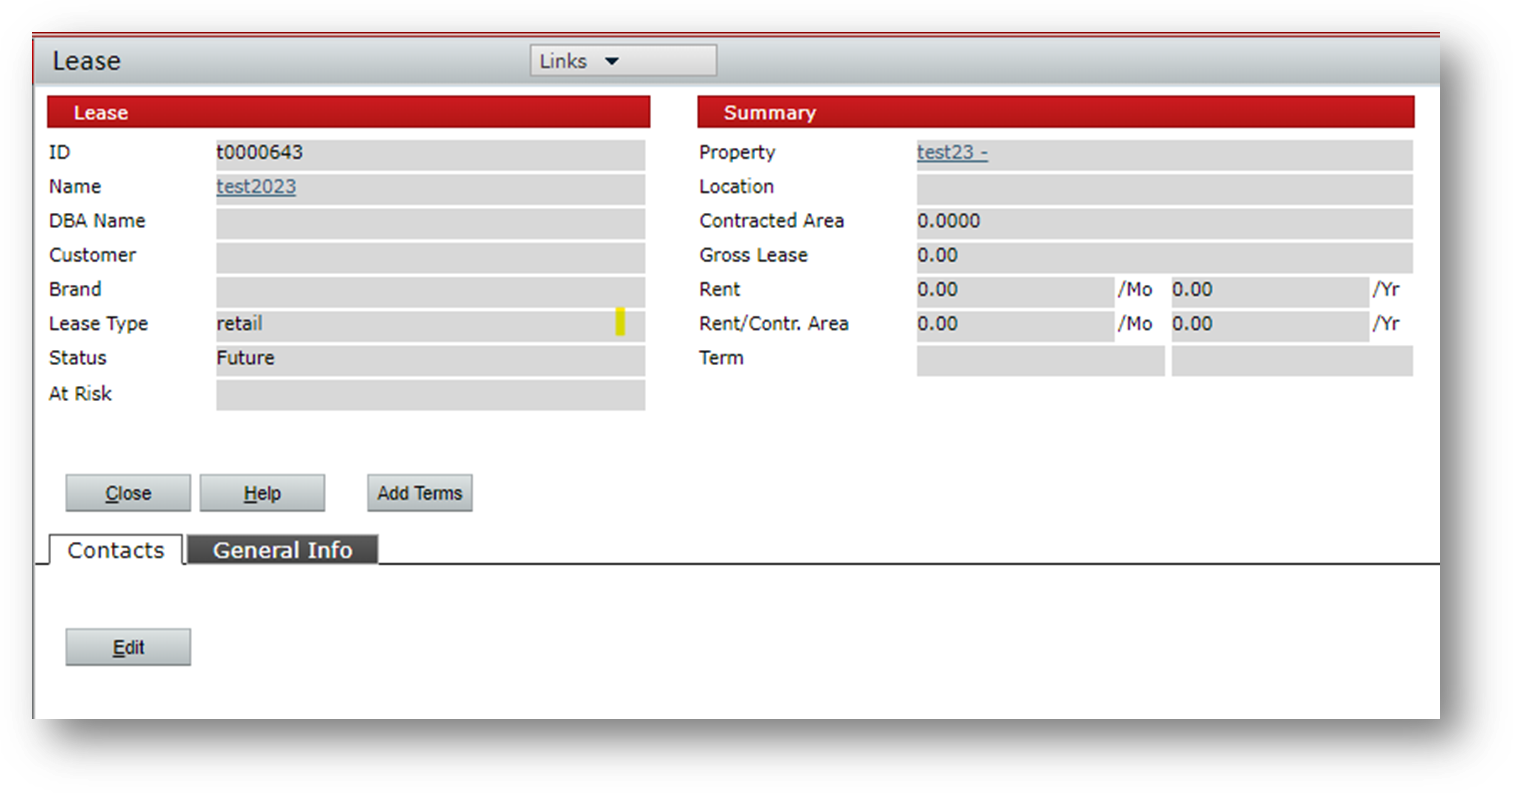
The Lease screen is the central lease record, attached to the Lease Information screen and to amendments.
Click the Edit button on the Contacts tab to add a billing contact. You cannot activate a lease without a billing contact.
Click the Add Terms button to add the first amendment (the original amendment, which contains the starting lease terms).
Amendment Screen:
Lease screen Add Terms button
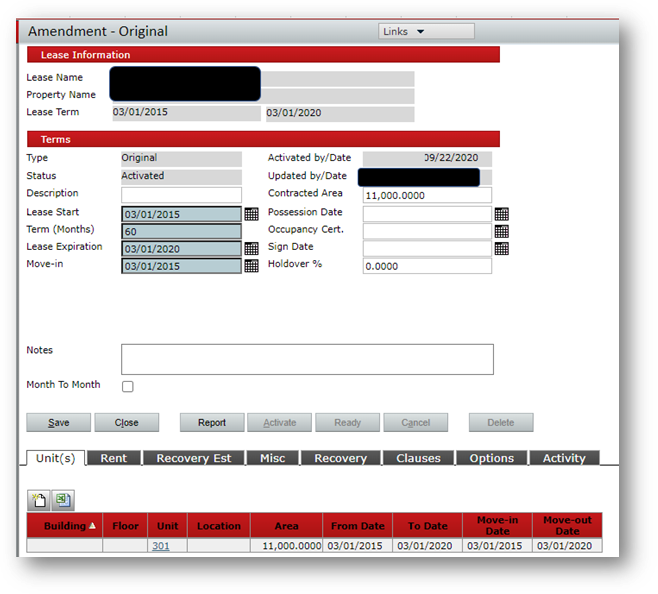
Complete the date fields in the Amendment Terms section (Lease Start, Term (Months), Lease Expiration, and so on).
Occupancy Cert and Possession Date are informational fields. Sign Date is also informational.
Use the Contracted Area field if the area figure in the tenant's lease is different from the area figure recorded in Voyager for the unit (or units) in the lease.
If you select the Month-to-Month check box, system allows you to save a lease without an end date. You can define charges, recovery, and retail parameters without end dates. Units are assigned to the lease indefinitely (until a termination amendment is added to the lease).
Click Save.
Activating Lease Amendments:
You must activate an amendment before lease charges can be posted.
To activate a lease amendment:
- On the Amendment screen, click the Ready button. This is a signal that the lease is ready to be activated.
- The label on the Ready button changes to Edit, and the amendment status changes to Ready. In this status, the amendment cannot be modified. If you need to change the amendment, click the Edit button to change the status back to In Process.
- On the Amendment screen, click the Report button. The Lease Abstract report appears. Use it to check the information in the lease record. If there is a problem with the lease, the second user can click the Edit button. This takes the lease back to the In Process status.
- Click Activate. The lease status changes to Activated.
