From how to create an invoice register to committing payments- the REstack team has you covered and can take you through step by step of any queries
How to Create an Invoice Register (IR, from now on)?
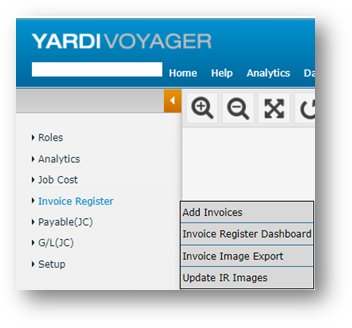
On the Left Menu, click on Invoice Register à Add Invoices
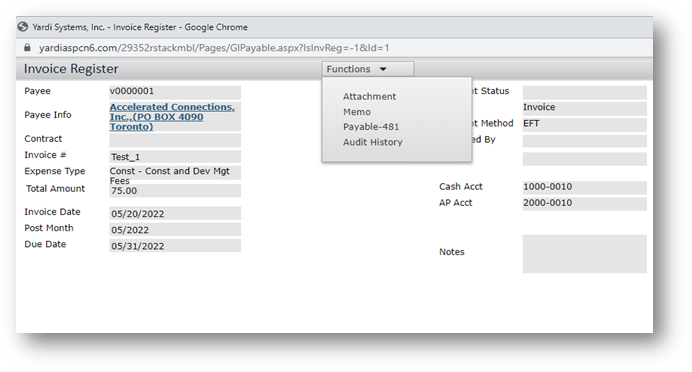
Once you click on Add Invoices, you will be redirected to the below screen:
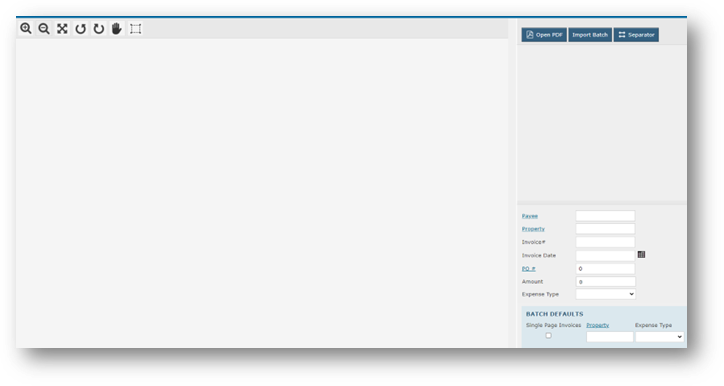
In order to add the invoice:
- Click on the Open PDF button on the top and attach the Invoice.

If the Invoice is successfully attached, it will show up as below: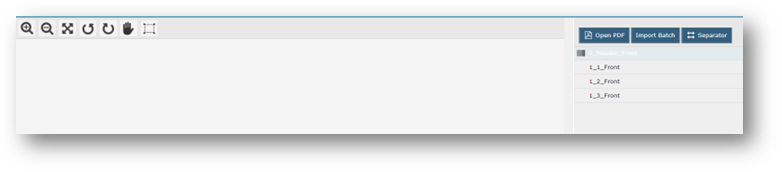
- Complete the remaining fields.
- Click Import Batch. A confirmation message with the Invoice Register Batch Number appears.
Reviewing Invoice Registers Using the Invoice Register Dashboard Screen
On the Invoice Register Dashboard screen, you can enter specific filter criteria to view Invoice Registers. From this screen, you can review the Invoice Register details, the image, and you can and post the Invoice Register to a payable batch. From this screen, you can also export invoice images to a PDF file.
To advance or review an Invoice Register using the Invoice Register Dashboard screen:
- Select Invoice Register > Invoice Register Dashboard. The Invoice Register Dashboard screen appears.
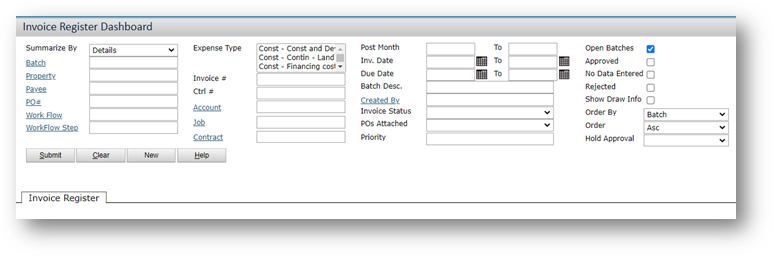
- Select the Filters as per your requirements or you can just click on Submit. If you do not select filter and hit Submit, the system will display all the Invoices.
Note: If you just want to see Open Invoices, you can tick Open Batches as shown above and hit Submit.
Reviewing Transactions Using the Workflow Dashboard Screen
Using the Workflow Dashboard screen, you can enter specific filter criteria to find the workflow that you want to review. You can select from a wide range of filter criteria, such as filtering workflows by status, their current step, their date range, Invoice Register status, and so on.
To advance a workflow using the workflow dashboard screen
- Open the Workflow Dashboard screen. (The menu path may vary. A typical path is: from the top menu, Dashboards > Workflow Manager Dashboard.)

- In the Object Type field, select Invoice Register, Payable or Purchase Order.
- Enter any additional filter items.
- Click Submit. Voyager displays the matching records under the Workflows tab.
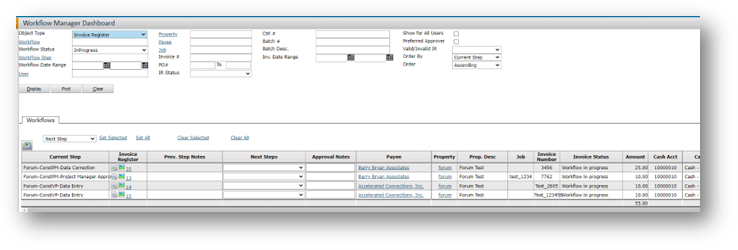
- If you want to advance a single workflow, select the next step in the Next Step column.
- If you want to advance multiple workflows:
- Select the next step from the Next Steps list for multiple workflows field.
- Click Set All. Voyager displays the next step that you selected on the Next Steps field.
- Click Post. Voyager advances the records to the next step that you selected in the workflow.
Advancing Transactions from the Transaction Screen
Workflows are used to route Invoice Registers or payable invoices to approval managers, so that they can perform the necessary actions (that is, they can approve, reject, or reroute it). The approver then reviews and moves the transaction to the next step in the workflow. Your system administrator sets up and assigns workflows.
The following procedure displays the Invoice Register screen as an example. However, the Invoice Register, Payable Invoice, and Purchase Order screens all include the workflow section where you can move the transaction to the next workflow step.
To advance a workflow on the transaction screen
- Open the transaction record for which you want to update the workflow.

- Complete the workflow section.
- Click Save
Payable Batch Creation
After your Invoice Register is approved, you can post it to create a payable batch.
To create a payable batch
- Select Invoice Register > Invoice Register Dashboard. The Invoice Register Dashboard screen appears.
- Complete the screen.
- Click Submit.
- On the Invoice Register tab, select the Post check box for each invoice that you want to include in the payable batch.
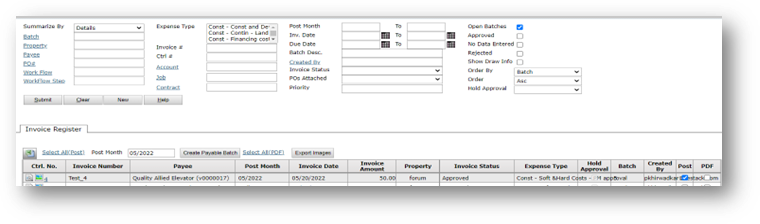
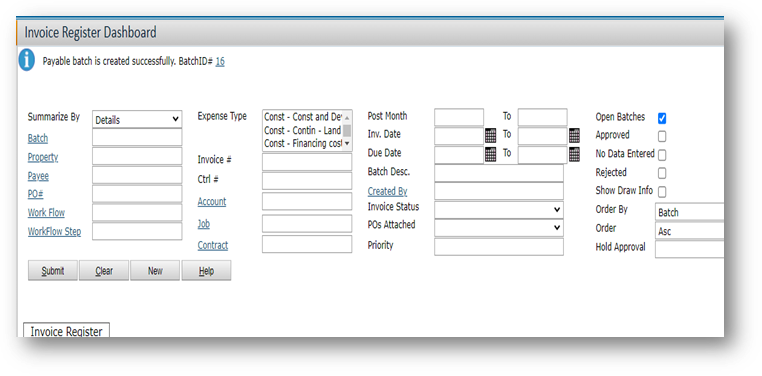
- Click Create Payable Batch. Voyager creates a posted payable batch and displays a confirmation message with a link to the payable batch. To review the payable batch, click the Batch ID #link.
- After you create a payable batch:
- The Invoice Register screen > Functions menu displays a link to the payable.
- The Payable Invoice screen > Functions menu displays a link to the Invoice Register.

- The Invoice Register screen > Functions menu displays a link to the payable.
Commit Payments
The Commit Payments step occurs after you have posted the payables, and before you process payments.
It is an approval step -- it marks the payables as ready for payment. Typically, this step is performed by a manager, not the person who entered the payables, and not the person who will process the payments.
You can approve the whole amount, or you can approve a partial payment.
To commit payables
- Select Payables > Payments > Commit Payments.
- The top part of the screen is a filter. Complete it as needed.
- Click Display. The Payments tab appears, displaying payables that are ready for approval. The Exceptions tab shows payables that cannot be committed, due to errors.
- Select the appropriate check boxes in the Approve column. To approve all payables on the list, click Check All.
- Review the amounts in the Amount to Pay column, and change them as needed.
- Click Commit to approve the selected payables. Voyager saves your approval selections, and updates payable records. The Commit Payments Report screen appears, displaying the approved payables.
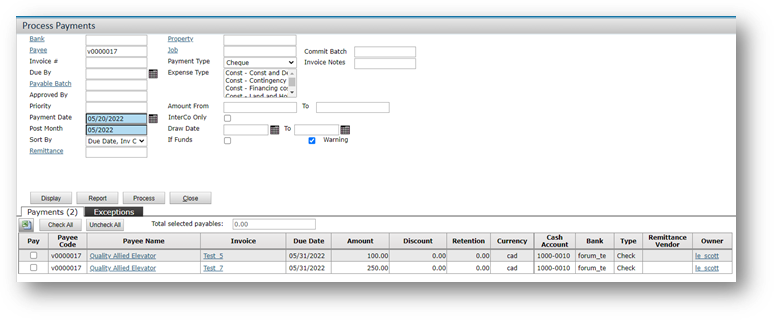
Processing Payments
The Process Payment function creates a payment for each payable (either a check or an EFT payment).
To process payments
- Select Payables > Payments > Process Payments. The Process Payments screen appears.

- The top part of the screen is a filter. Complete is as needed to select the payables you want to process. In the Payment Type field, select Check or EFT.
- Click Display. The Payments tab appears.
- Select the check boxes in the Pay column for the payables that you want to process. To select all payables, click Check All.
- Click Process. Voyager creates checks or EFT payments.
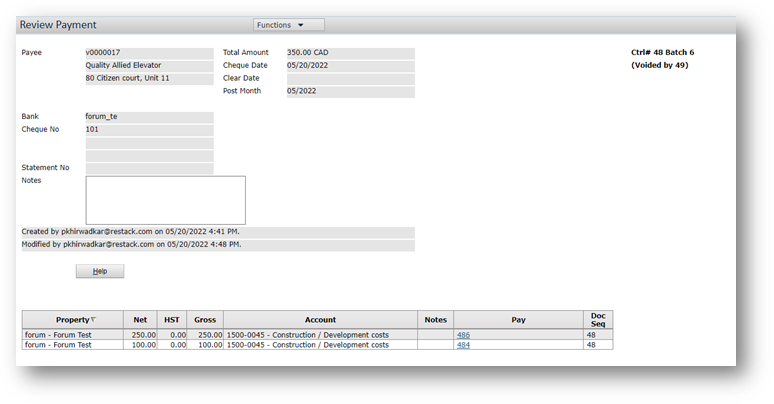
Voiding Checks
If a check has not been reconciled, you can void it. Voyager creates a new payment record with a negative amount to back out the original one.
When you void a check, you can also reverse the associated invoice (the payable). In this case, Voyager creates a new invoice with a negative amount to back out the original one.
You can void checks by selecting a function from the side menu or by clicking the Void button on a payment record. If you want to void a number of checks, we recommend using the function from the side menu, because it allows you to void a number of checks at once.
To void checks
- Select Payables > Payments > Void Checks. The Void Check filter appears.
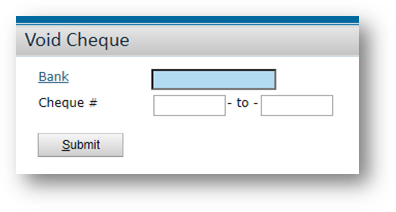
- Select a bank and enter a range of check numbers.
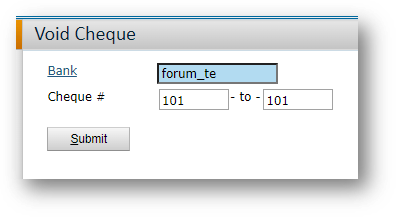
- Click Submit.
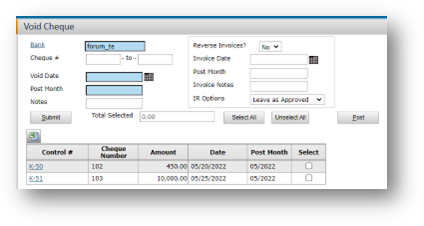
- Select the checks you want to void.
- Complete the fields in the top part of the screen.
- Click Post
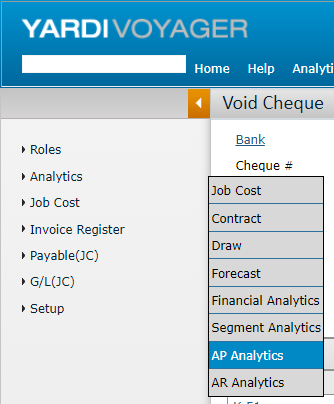
Reporting
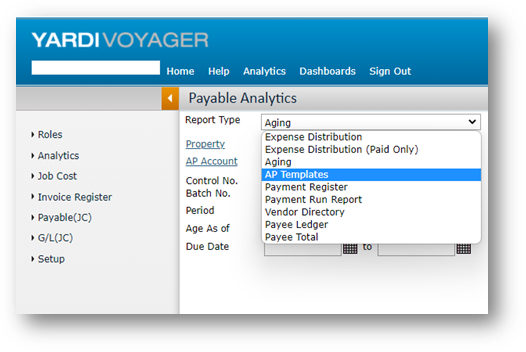
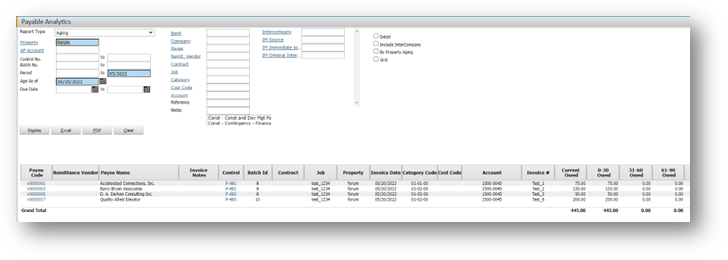
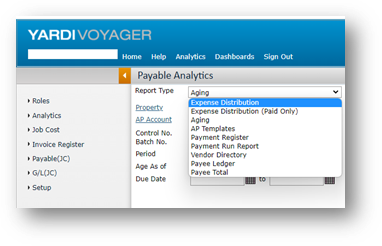
There are various reports available for tracking the Account Payable. The section AP Analytics has all the report to track AP.
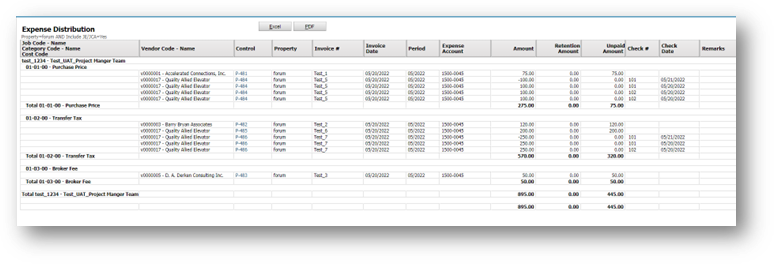
In AP Analytics, there are many reports which you can refer but the most important reports are AP Ageing Detail and Expense Distribution Report
- AP Ageing Detail
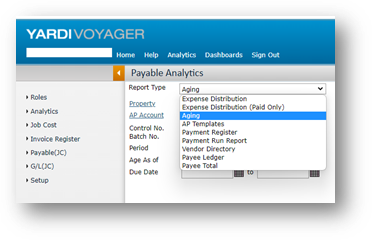
- Expense Distribution
Other than the above two mentioned reports, there are other report too which you can refer.