This document is intended for the Users to introduce/showcase Process of Creating Vendor in Voyager.
Overview
Vendors are people and organizations that you pay for goods and services, for example, contractors, landscapers, and home improvement stores. Set up the property management company as a vendor if it receives commissions or other fees.
Before you can make a payment to a vendor, you have to set them up in the database and approve them.
Paying Non-Vendors
Although you may occasionally pay legal entities, owners, employees, and tenants, do not add them as vendors; Voyager allows you to make payments to non-vendors.
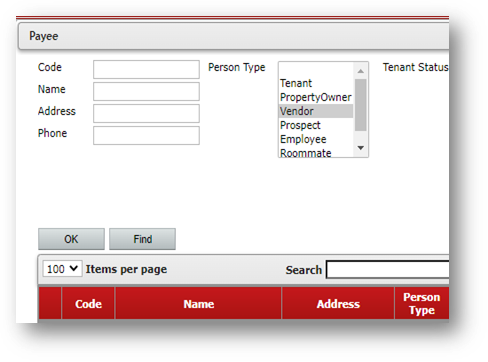
When you enter a payable, you select a payee. The lookup defaults to vendors, but you can select any “person-type” record in the database.

Besides vendors, you can select:
- tenants
- property owners
- prospects
- employees
- roommates
- customers
Vendor Setup
To add a vendor
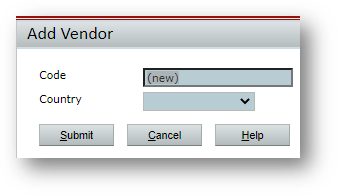
- Select Setup Vendors Add Vendor. The Add Vendor filter appears. (Please note that this Navigation path might differ depending on the Role and Menu sets within the role)

- Complete the screen and click Submit. The Vendor screen appears.

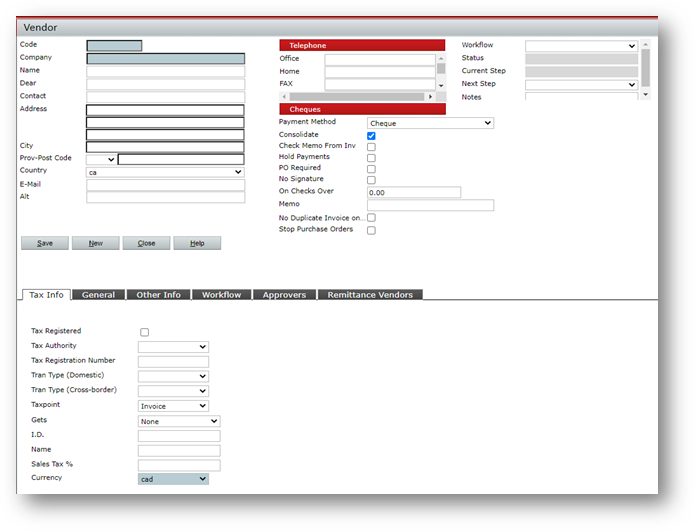
- Complete the Vendor screen. The following sections describe each tab and section of the Vendor screen.

The following fields require explanation:
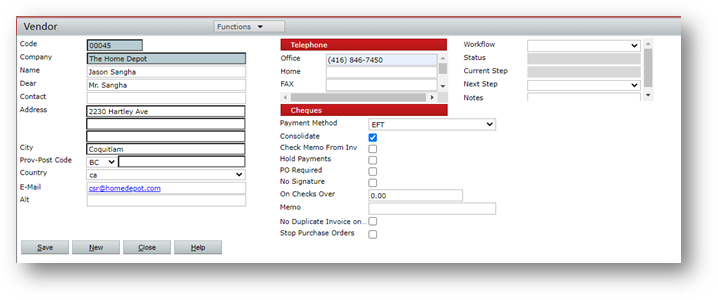
Company Name: Voyager uses the Name field followed by the Company field, to form the payee’s name on payments.
For individuals, enter the first name in the Name field and the last name in the Company field.
For example: Name = John, Company = Doe. Payee Name = John Doe.
For businesses, the Name field is optional. You can enter the entire payee’s name in the Company field, or you can split the payee’s name between the two fields.
For example, if the vendor’s name is The Ace Company, type The in the Name field and Ace
Company in the Company field. The vendor’s name, The Ace Company will be used on payments.
Dear: Type the text that should appear after the word Dear at the beginning of a letter. For example, if your contact is Patricia Smith, you might type Ms. Smith in the Dear field. If you are unsure of the appropriate courtesy title, you can type the name with no courtesy title. For example, if your contact is Pat Smith, you might type Pat Smith in the Dear field. The Dear field is used in system-generated letters, for example, letters created by the Correspondence feature.
Payment Method: Select Check or EFT. Sets a default for payments to the vendor. (If needed, you can override the default when you create payables.)
Consolidate: Specifies that multiple payables to the same vendor are paid with one payment. (This check box is selected by default, but not required.)
Check Memo from Inv: Select this check box if you want the memo on the check to come from the Notes field at the top of the Payable Invoice screen. If not selected, the memo on the check will come from the Memo field on the Vendor screen.
Hold Payments: Prevents processing a payment to this vendor.
PO Required: Select this check box if you require purchase orders for payables to this vendor.
No Signature/On checks Over: If you sign checks with a bitmap signature and you want to suppress the bitmap for checks over a certain amount, select the No Signature check box and type the highest amount for which a bitmap signature is permissible.
No Duplicate Invoice: Select this check box if you want to prevent users from saving more than one payable with the same date and invoice number. For example, if there is an existing payable with an Invoice Date of 05/31/2011 and an Invoice # of 1234, and a user tries to save another payable with the same invoice date and invoice number, they will not be able to.
