this article use REstacks expertise this easy guide for all thing account receivables- from tutorials to definitions
User guide for Account Receivables
Charges
A charge is an amount owed for a service or product. Charges can be positive or negative. Positive charges increase tenant balances (the amount owed); negative charges decrease tenant balances.
Most charges are set up once, as lease charges, and generated automatically thereafter.
You enter charges in groups called batches.
Before posting a batch, you can edit charges in the batch, add charges to the batch, and delete charges from the batch.
In order to create charge, on the Left Menu, click on Charges à Charge Functions à Create Charge Batch
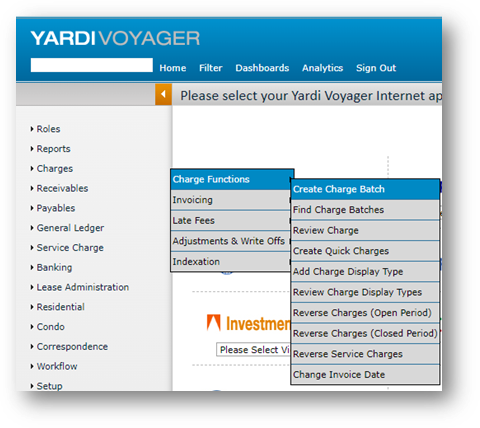
To create an ad hoc charge batch
- Select Charges > Create Detail Batch.

- Complete the top part of the screen (the batch header). The Total Declared and Items Declared fields act as batch controls. When you are entering charge invoices, and the totals meet (or exceed) the number in either field, the batch header screen reappears after you click Save.
- Click the New Record button. The Charge Invoice screen appears:
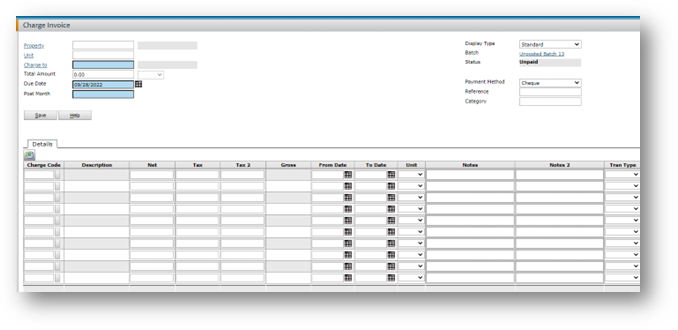
- If needed, change the Display Type. (Change the display type before you enter data; if you change it after entering data, the data will be lost.)
- Complete the Charge To field. (If needed, complete the Property and Unit fields to narrow the choices in the Charge To lookup.)
- In the Details grid, enter the charges:
- Select a Charge Code and type the Amount for each charge. When you tab out of the Amount field, the system calculates the tax (if applicable) and the totals.
- Click Save. A blank screen appears where you can enter the next charge invoice.
- When the items entered meet (or exceed) the control numbers (either the number of items or the total amount), the batch header screen appears.
- In the batch header screen, adjust the Total Declared and Items Declared fields, if needed, and post the batch. (You cannot post a batch until the two sets of figures match.)
Reviewing and Editing Charges
To review and edit charges
- Select Charges > Review Charge. The Charge filter appears.
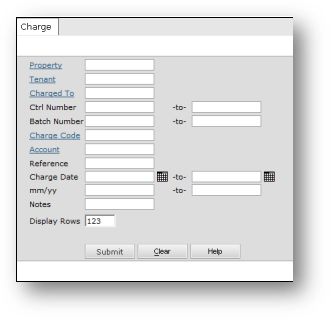
- Complete the filter and click Submit.
- The Charge Invoice screen appears.
Finding Charge Batches
Once the Charge batch is posted, you can search for a particular batch and view the batch header as well as the individual items in the batch.
To find charge batches:
- Select Charges > Find Charge Batches. The Charge Batch Filter screen appears.
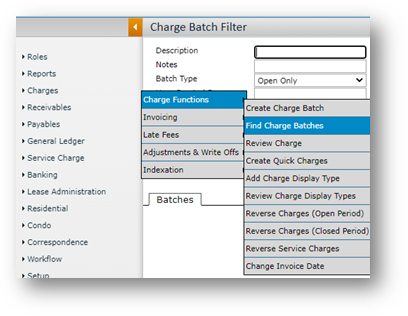
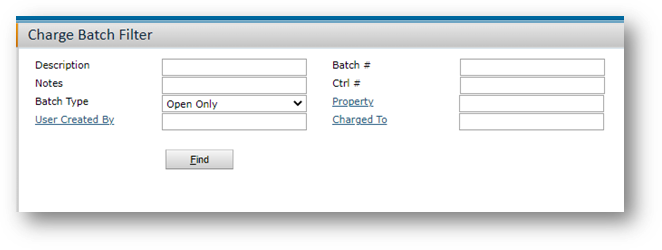
- Complete the top part of the screen. The following field requires explanation:
Open Only Show only unposted batches. (Unposted batches are “open” because you can edit them — you can add or delete charges. Posted batches are “closed.”)
Empty Only Show only empty batches (batches that have a header but no charges).
All Show posted and unposted batches, including empty batches. - Click Find. The system displays the matching batches.
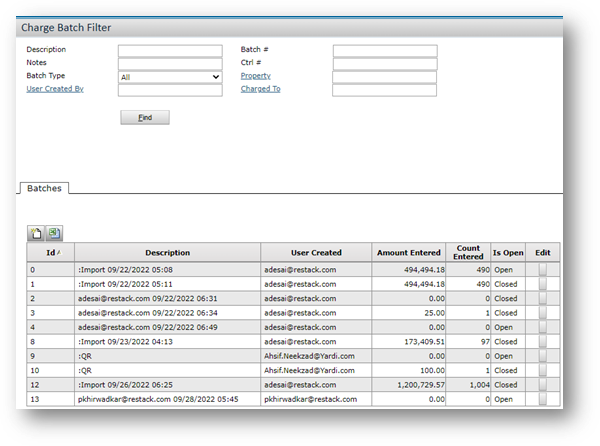
- To view a batch, click the Edit button. The Batch Charge screen appears (the batch header).
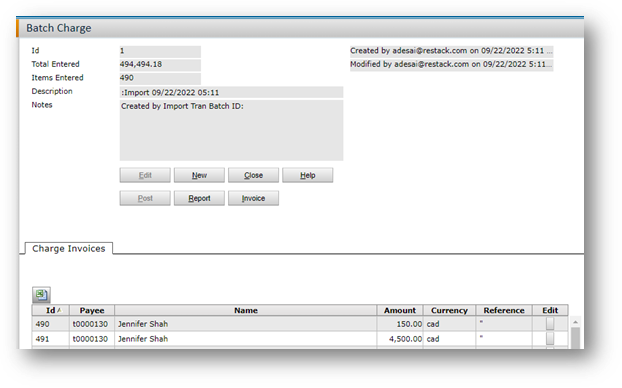
- In the Batch Charge screen, you can do the following:
-
- Drill down to individual records (for posted and unposted batches).
- Edit and post the batch (if it is unposted).
- Run the batch report (for posted and unposted batches).
Receipts
Receipts record revenue and match the funds against open charges (the charges are “paid off”). If there are no open charges, the funds are then considered prepayments.
Creating Receipt Batches
To create a receipt batch, you perform the following:
- Complete the batch header (the top part of the Receipt screen).
- Add individual receipts (in the bottom half of the screen).
- Post the batch.
To create a receipt batch
- Select Receivables > Create Detail Batch. The Batch Receipt screen appears.
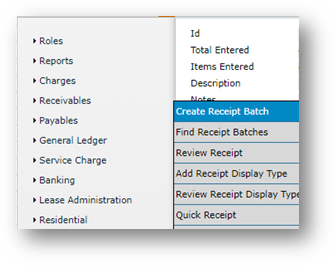
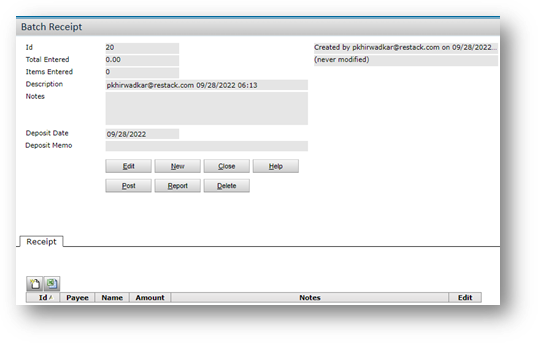
- Complete the top part of the screen (the batch header) and click Save.
- In the Receipt tab, click the New Record button. The Receipt screen appears.
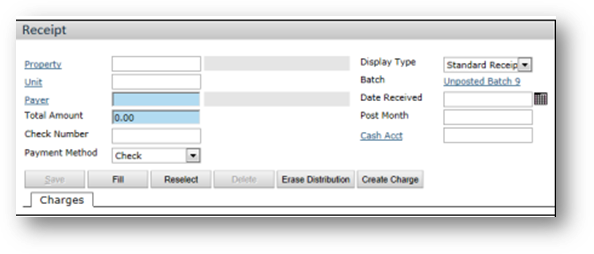
- If the default Display Type does not include all of the necessary fields, select a different one.
- Complete the Payer field. Selecting a Property and Unit first limits the choices that appear in the Payer lookup. When you complete the Payer field, system displays the open charges for that payer in the DataGrid (the bottom portion of the screen) and fills in the Total Amount field with the sum of the open charges.
- Adjust the Total Amount as needed. When you tab out of the Total Amount field, Voyager distributes the amount against the open charges (by completing the Pay column in the DataGrid).
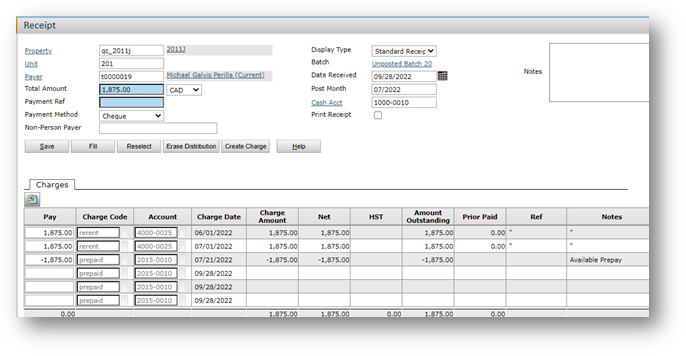
If the total amount is less than the sum of the charges, system “pays off” the charges in the order that they are presented. - Make adjustments in the Pay column as needed. To start from scratch, click Erase Distribution. (This clears the cells in the Pay column.) You can then click in the rows you want to include in the distribution, or you can enter amounts manually. Click Reselect to select another payer, or to start over with the same payer.
- Complete the Check Number field (use it to record the check number)
- When the screen is complete, click Save. A blank screen appears where you can enter the next receipt. After saving, you cannot edit the details lines. If there are errors, you can delete the receipt and re-enter the data. However, after saving, you can edit the fields at the top of the screen: the notes, check number, the dates, and so on.
- Continue entering receipts. When the items entered meet (or exceed) the control numbers (either the number of items or the total amount), the batch header screen appears.
- When you have entered all the receipts, return to the top part of the screen (the batch header). Adjust the Total Declared and Items Declared fields, if needed, and post the batch. After you post the batch, the Deposit button appears on the screen.

- Click the Deposit button to print a deposit slip.
Reviewing and Editing Receipts
To review and edit receipts
- Select Receivables > Review Receipt. The Receipt filter appears.
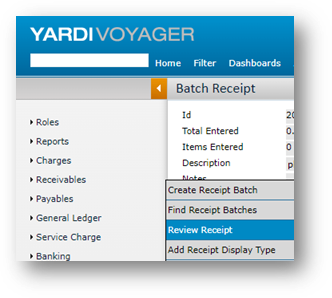
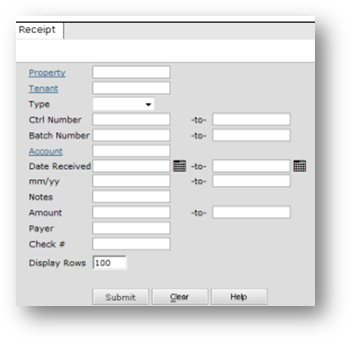
- Complete the filter and click Submit.
- The Receipt screen appears
Finding Receipt Batches
Batch records are available after you post the batch. You can search for a particular
batch and view the batch header as well as individual items in the batch.
To find receipt batches
- Select Receivables > Find Receipt Batches. The Receipt Batch Filter screen appears.
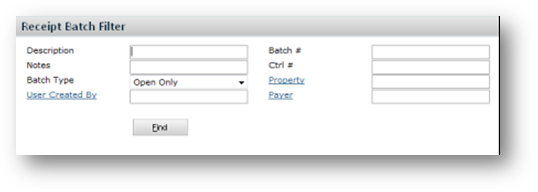
- Complete the top part of the screen. The following field requires explanation:
Open Only Show only unposted batches. (Unposted batches are “open” because you can edit them — you can add or delete charges. Posted batches are “closed.”)
Empty Only Show only empty batches (batches that have a header but no receipts).
All Show posted and unposted batches, including empty batches. - Click Find. System displays the matching batches.
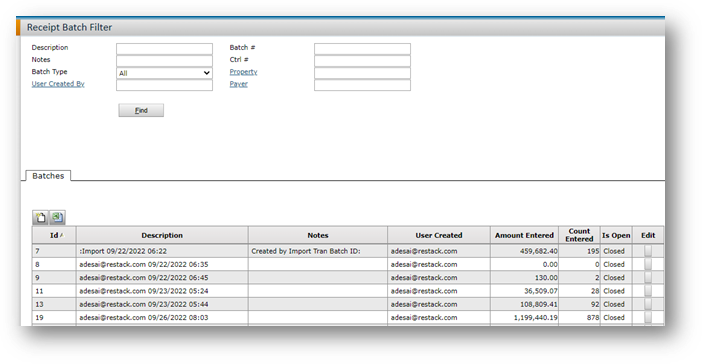
- To view a batch, click the Edit button. The Batch Receipt screen appears (the batch header).
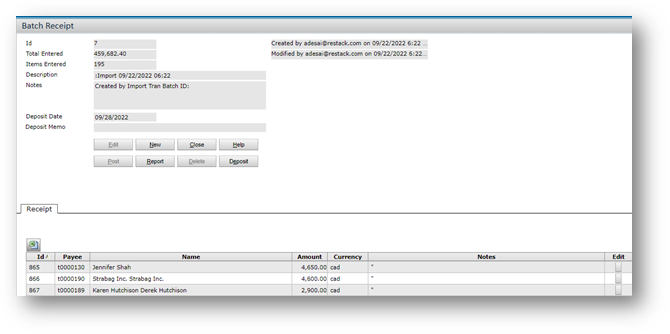
- In the Batch Receipt screen, you can do the following:
-
- Drill down to individual records (for posted and unposted batches).
- Edit and post the batch (if it is unposted).
- Run the batch report (for posted and unposted batches).
Prepayments
A prepay occurs when a tenant makes a payment before a corresponding charge has been recorded; for example, when a tenant pays the rent on the twenty-fifth of the month but the rent charge is not created until the thirtieth. If there are no open charges, the funds are marked as a prepayment. The prepayment is then applied to the rent charge after the charge is created on the thirtieth of the month.
Recording a Prepay in the Receipt Screen
You enter a prepay in the Receipt screen. When you complete the Amount field and then tab or click outside of that field, System automatically applies the amount to the charges that appear at the bottom of that screen. If the amount of the receipt exceeds the total amount of the charges, System creates a prepay line and assigns the excess amount to that line.
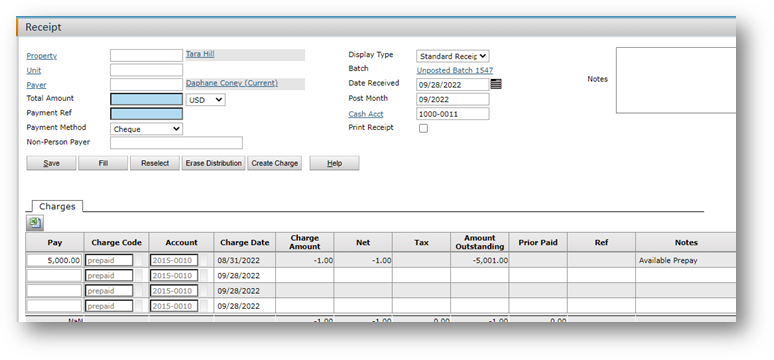
In the example shown above, there were no charges, so system assigned the total amount to a prepayment charge code. If you select the Auto Apply check box, system will automatically apply the prepayment to the next available charge.
You can use the Hold For field to reserve the prepayment for a charge with a specific charge code; for example, you hold the prepayment for a charge with the misc charge code.
Periodic Invoicing
Lease charges are invoiced on a periodic basis, typically monthly or quarterly. Lease charges are defined on Charge Schedule screens in the lease record.
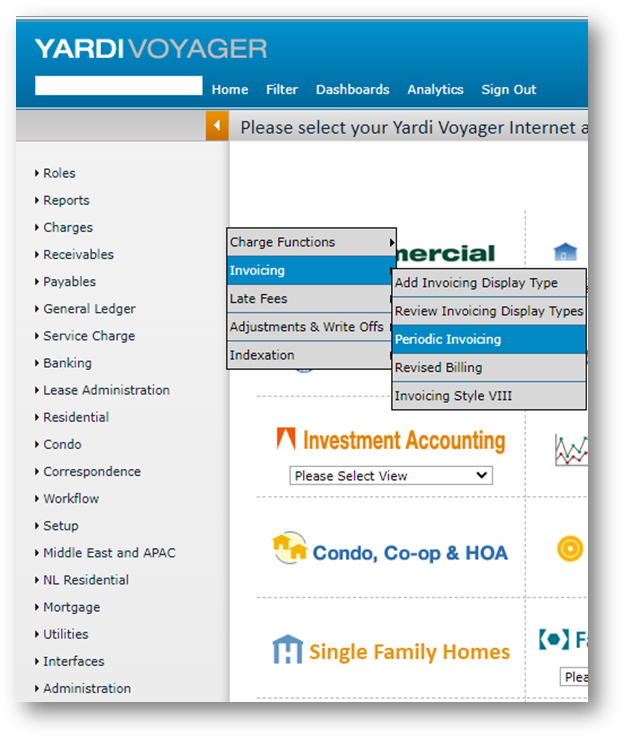
Invoicing Process- Select Charges > Invoicing > Periodic Invoicing
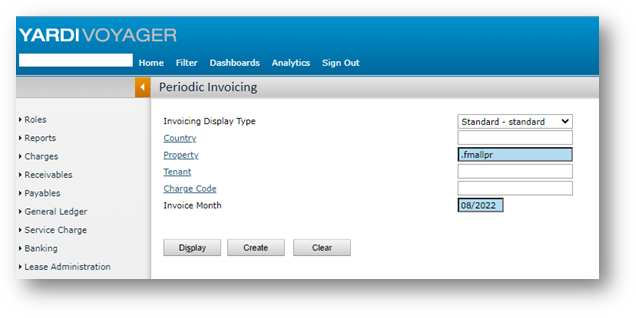
- Complete the filter and click Submit. Voyager creates a charge batch.
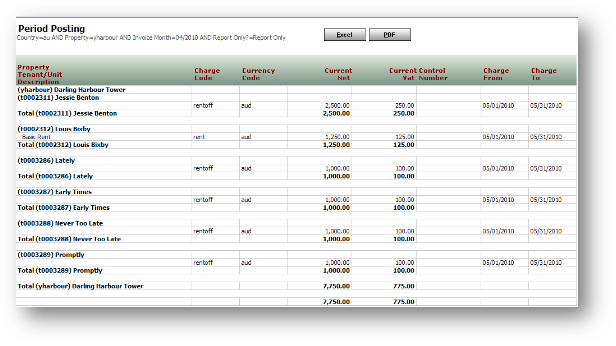
- Post the charge batch.
- When you post the batch, Voyager either:
-
- Displays a Crystal report window with individual invoices that can be printed and mailed to ten-ants, or
- Opens the Correspondence screen, where you can create the invoices, and print or email them.
Note: Voyager opens the Correspondence screen if you have done the setup for Correspondence Management.
